In this tutorial, I will show you a quickstart to have your first API up and running in minutes.
The Django REST Framework is a powerful toolkit for building APIs on top of the Django Framework.
I’m going to use Django Framework 3 and assume you have the latest version of Python 3 installed. I did this tutorial with Python 3.8.1.
Environment
On a terminal, create a folder with your project name enter in it.
mkdir myproject
cd myproject
Create a virtual environment to work on.
python3 -m venv venvActivate the virtual environment.
. venv/bin/activateCheck for the (venv) at the beginning of the command line, it indicates the virtual environment started successfully.
Install Django Framework
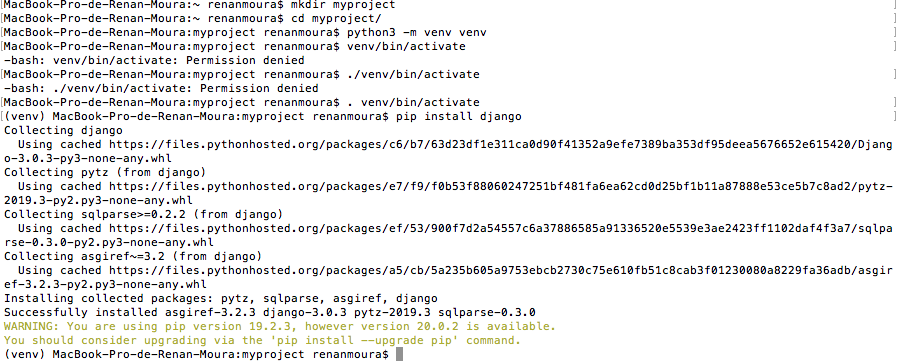
Use pip to install the Django Framework.
pip install djangoYour output should be similar to this. 
Start your first project with the django-admin cli.
Mind the . to create the structure in the current directory.
django-admin startproject myfirstapi .Then use the manage.py to create the database with the migrate parameter.
python manage.py migrateYour output should be similar to this. 
Create a super user to use the admin panel.
python manage.py createsuperuserUser admin and password 123, it\’s going to complain about the password being too simple, just agree. 
Finally, run the server.
python manage.py runserverIf everything was alright, your output should be similar to this.

Check http://localhost:8000 in a browser.

Enter http://localhost:8000/admin in a browser.

Login with admin and 123 those were the credentials chosen earlier.

Great! Now you have Django up and running.
Install Django Rest Framework
CTRL-C on the terminal to shutdown the server.
Use pip to install the Django Rest Framework
pip install djangorestframeworkThe output of the installation should be similar to this.
 ## Create the app
Create your first app named person.
manage.py startapp person
Open myproject folder in some editor, I use VSCode.

settings.py
In settings.py, at the end of INSTALLED_APPS, add:
    'person',
    'rest_framework',
Like so:

models.py
Inside the person folder, openmodels.py and create a Person class:
from django.db import models

class Person(models.Model):
    name = models.CharField(max_length=100)
    surname = models.CharField(max_length=100)
    address = models.CharField(max_length=200)

    def __str__(self):
        return self.name
serializers.py
In the same level of models.py create a serializers.py with the following content:
from rest_framework import serializers
from .models import Person

class PersonSerializer(serializers.ModelSerializer):
    class Meta:
        model = Person
        fields = ['id', 'name', 'surname', 'address']
views.py
In views.py, write the following code:
from rest_framework import viewsets
from .models import Person
from .serializers import PersonSerializer

class PersonViewSet(viewsets.ModelViewSet):
    queryset = Person.objects.all()
    serializer_class = PersonSerializer
admin.py
In admin.py, register our class to appear in the admin panel.
from django.contrib import admin
from .models import Person

admin.site.register(Person)
urls.py
In urls.py, create the routing for our API in the /persons:
from django.contrib import admin
from django.urls import path, include
from rest_framework import routers
from person.views import PersonViewSet

router = routers.DefaultRouter()
router.register(r'persons', PersonViewSet)

urlpatterns = [
    path('', include(router.urls)),
    path('api-auth/', include('rest_framework.urls', namespace='rest_framework')),
    path('admin/', admin.site.urls),
]
Update the database
Finally, makemigrations to create the scripts according to the current structure:
python manage.py makemigrationsAnd update the database with the scripts created earlier.
python manage.py migrate
Checking the API
Start the server.
python manage.py runserver
Check http://localhost:8000/admin and log in with admin and 123 and add a new person.


In a browser, access http://localhost:8000/persons/, you should see the record corresponding to the one you created in the admin panel.

That’s it! A simple endpoint almost effortlessly.
Notice that you have all the basic operations in a CRUD: Create, Read, Update and Delete.